|
|
|
Helpful Hints
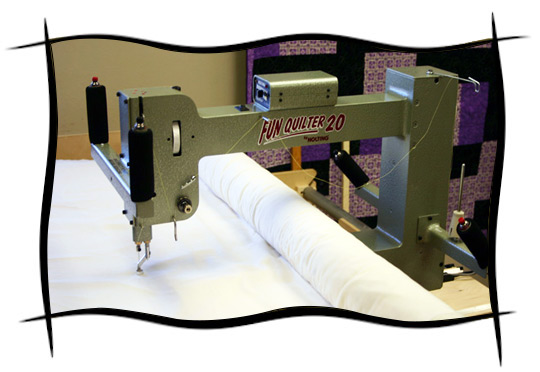
Nolting Longarm Quilting Machines are extremely well built by experienced craftsmen. It is very rare when something is broken on a Nolting machine. All Nolting machines go through a rigorous testing process and have been sewn with for some time before leaving the factory. If you are having a problem, it is probably something basic. This troubleshooting guide is meant to help you diagnose and solve the basic problems you may encounter.
Don’t hire a repairman until you have tried these hints or called your dealer or the technicians at the factory. Nolting machines are made so you can do almost all the repairs yourself.
General maintenance
To assure proper operation of you Nolting longarm quilting machine we recommend that you keep the machine and table clean. This means that you should keep the wheels and tracks clean and free of oil, lint and thread. Occasionally clean the wheels with rubbing alcohol and then use a dry cloth to wipe off any excess debris. Clean the track after removing each finished quilt. We recommend using a small scrap of batting. Simply move the machine to one end of the table. Wipe the U shape bottom of the track from the middle out with the batting scrap. Move the machine to the other end of the table and repeat, wiping in the opposite direction.
You will notice that the needle bar gets oily. You can clean this with a clean cloth. The oil comes from inside when you oil the wicks. We recommend that you place a drop of oil on each wick located at the top your machine (painted red) once every eight hours of sewing time. Also, you should place a drop of oil in the bottom rail of your hook assembly once every three to five bobbin refills. Park the machine off to the side of your quilt so you don’t get any oil on the quilt. Let the machine run for a minute at a slow speed with the thread out of the needle and the bobbin and bobbin case out. Wipe any excess oil off with a clean cloth. Clean any lint or fuzz from the bobbin case and hook area with compressed air. You may want to do this every couple of hours. This will increase the life of your bobbin case and hook assembly.
It is also a good idea to warm up your quilting machine before you start to quilt each day. Your machine will run a little looser when it is warm. Simply pull the thread and bobbin case. Then run your machine off the quilt in a slow constant speed while you are preparing the quilt. A few minutes should be plenty.
Tension Ideas
Big Loops on the bottom of your quilt almost always indicate that your machine is not threaded properly. Concentrate on the area around the tension assembly. You will probably find the thread is not following the proper course. The thread may be jumping out of the tension discs. The thread wearing a groove in the flat part of the discs usually causes this or this may be caused by the tension being too tight. If the tension is too tight you must loosen it by turning the thumbscrew on the tension assembly counter clockwise. If the thread has worn grooves in the disc, remove the discs. Set a piece of 240 grit or finer emery cloth flat on a table, place the discs flat side to the emery cloth and sand in a circular motion. This will remove the grooves and allow the thread to travel through the discs without jumping out. Remember that you may not be able to see the grooves but sanding will help. If you need a complete tension assembly they are available in the Nolting catalog.
Bobbin case tension should be set if you change types of bobbin thread. In the palm of your hand check the tension by trying to lift the bobbing and bobbin case by the thread. It should stand up and unwind the thread, maybe lightly lifting off of your hand. If it does not stand up you will need to tighten the bobbin case tension. This is done by tightening the bigger of the two screws on the outside of the bobbin case. A little movement of this screw will greatly change the tension. If the bobbin lifts out of the palm of your hand you will need to loosen the screw to loosen the tension. If you can’t get the bobbin case adjusted you should check to make sure that it is clean and not bent.
Skipped Stitches
First you must understand the difference between a long stitch and a skipped stitch. A skipped stitch is when the needle penetrates the fabric but does not leave a stitch. A long stitch is when the needle has not penetrated the fabric until it is moved a greater distance. By explaining the basic function of stitching you will better understand of what is happening.
The needle punctures the fabric taking the top thread with it. At the same time the hook point rotates around and scoops the thread off of the backside of the needle. As the hook rotates it guides the thread around the bobbin case to form a knot. It is important that the hook is timed to the needle correctly and that the distance between the needle and the hook point is correct. The hook point must be sharp and not rounded or the thread might not be picked up causing a skipped stitch. The timing will be covered in another section.
Flexing the needle is often the cause of skipping. Flexing can happen by out running your machine or using too fine of a needle. You will notice usually when you push the machine away from yourself when working from the needle end of the machine. The needle flexes and pulling away from the hook point. The hook cannot pick the thread up off of the back of the needle, causing you to skip a stitch or even break a needle. The thinner the needle you wish to use, the looser the quilt will need to be on the frame. Try loosening the quilt a couple of notches. Quilting over heavy seams can also cause needle flex. A dull needle may also cause you to flex the needle causing the same problem.
Skipped stitches may be caused by the needle being out of square with the hook. This happens because the scarf or flat spot on the back of the needle is rotated far enough that it actually turns the thread way from the point of the hook. This does not allow the point of the hook to pick up the thread. When replacing a needle always make sure the needle is in all the way and that the scarf or flat spot is toward the back of the machine. Also make sure that the needle is square with the hook point. The groove running the length of the needle should be facing forward.
If the foot is not adjusted properly your machine may skip stitches. We set the height of the hopping foot to the thickness of a Dime above the throat plate. It must be set high enough so it doesn’t drag on the material and restrict your movement but it must be close enough to hold the fabric down so the needle can come back up out of the fabric properly. If it is too low it may also cause your machine to clatter.
Incorrect hook timing can cause skipped stitches. The hook point must be very sharp and very, very close to the needle. You can order a replacement hook from Nolting. You will need to know if you have regular (L) size or a big hook (M) size. You can find this on your original invoice or you can call and we can help you determine the size. If the timing is off you can go to the timing section of this manual.
As some machines get older the hook shaft bushing may wear. This is because there is a 5/16” lock collar that holds the hook shaft and gear assembly in place, this rides on the bushing face. If your hook shaft bushing is worn you will notice a 1/16” or more of play when you push and pull on the hook assembly. This will cause the hook point to move away from the needle, therefore, the hook cannot pick the thread up off of the back of the needle. To fix this you must loosen the set screw on the lock collar and then pull out on the hook assembly. While holding the hook assembly out you must push the lock collar in against the bushing and retighten the set screw. You may need to adjust the timing after doing this.
After quilting hundreds or thousands of quilts the bushings that guide the needle bar will wear. Congratulate yourself. This allows the needle to move towards and away from the hook point. If this is the case you will most likely skip stitches when you are at the front of the machine pushing it away from you or when you are at the back of the machine pulling it towards you. To fix this problem the needle bar bushings must be replaced. Since the needle bar may also be worn I would recommend that you have an experienced repairperson replace the bushings so that they can be matched to the needle bar. You deserve the break. To check for needle bar bushing wear, lower the needle bar all the way down with the throat plate off. Wiggle the needle bar forward and back while watching the gap between the needle and the hook point. Slight movement is normal but if you notice 1/16” gap or larger you may want to have this checked by a repairperson.
Sometimes polyester fabric or a tightly woven bottom fabric (bed sheets) will cause a skipped stitch. These tightly woven fabrics will sometimes hold the thread so tight to the needle that if the gap between the hook point and the needle is just slightly too big the hook point can’t reach the thread. You may be able to cure this by moving the hook point a little closer to the needle. You may also find that with very tightly woven fabrics you are more apt to flex the needle away from the hook point and skip a stitch.
Top Thread Breakage
Most thread breaking problems are caused by the thread. Always use a good quality thread. This will eliminate a lot of problems. We recommend any strong thread. Longarm quilting machines sew very fast. You need very strong top thread to sew at these speeds.
If you are using good strong thread and still getting breaks, these are some of the many causes for top thread breakage. I will start at the back of the machine and work my way forward.
You want to make sure that the thread is coming off of the spool freely and not catching. Also make sure that the thread guide above the spool is centered over the spool and that there are no burrs or rough spots on the thread guide that might cut your thread.
Check the spool pin. You will notice most spool pins have two holes in them. I recommend that you use only one of these holes. I prefer to use the bottom hole. The reason I use the lower hole is because sometimes the thread will jump as it is coming off of the spool, causing the thread to backlash. When this happens the thread will sometimes loop around the spool pin causing the thread to break. By using the bottom hole the thread is less likely to loop around the spool pin. Also check these holes for wear, roughness or burrs.
Check the three-hole guide for burrs or wear. Also make sure that you thread it properly. Coming from the back of the machine come down through the first hole. Then up through the middle hole and back down through the last hole. Now run the thread under the tension discs and pull the thread all the way between the discs. Bring the thread over the take up spring. If the tension is too tight this may break the thread. Sometimes when the discs get a groove worn in them the thread may break. After time grooves can be worn in the discs. This can cause the thread to jump out of the disc and allow the thread to jump around and catch on things. Removing the discs and lightly sanding the flat part of the discs with a very fine emery cloth or sandpaper can cure this.
Next the thread goes under the duck bill. Check the duckbill for wear or burrs. If you find it to be rough you can lightly sand it with a fine sand paper or emery cloth.
Put the thread through the hole in the take-up lever. If you find that the thread is breaking here you will most likely have to replace this part since it is too small to easily sand. You are more likely to see wear on this part if you use metallic or monofilament threads.
Bring the thread through the pigtail. Check this part for burrs or wear. It is easier to change this part than to fix it.
Bring the thread through the needle bar thread guide, checking for wear or burrs. Sometimes you can debur this part with emery cloth or sandpaper but this is an inexpensive part to replace. It is a good idea to have an extra needle bar thread guide on hand.
Last you thread the needle. Sometimes the eye of the needle will have a rough spot on it. If this is the case you will need to replace the needle. Check the hole in the throat plate for grooves or burrs. Sometimes when the needle is flexed or the needle bar bushings are worn the needle will cut a groove in the edge of the hole creating a burr. You can fix this by removing the two screws in the throat plate and popping the throat plate out. Tear a narrow piece of emery cloth or sand paper and run it back and forth through the hole of the throat plate. If the throat plate is not repairable, you should order a new one.
While you have the throat plate off you should check the point of the hook to make sure that it is sharp and not rounded. You can sharpen it or clean it up with 180 grit or finer emery cloth. It is important not to change the angle of the point. Also, while you have the throat plate off check the hook shield. Look at the hook shield to see if there are any burrs or rough spots on the surface. You may find it helpful to run your fingernail over this surface to check it. Debur the hook shield with a very fine emery cloth. If you can’t get the hook shield smoothed out you will need to replace it.
Sometimes old thread will dry out and break easily. You may be able to use it by getting it damp and placing the spool of thread in a plastic bag and then placing the bag in your freezer over night. The next day remove it from the bag and let it thaw. This will put moisture back in the thread and strengthen it.
The basic rules are for you to look at the end of the thread after the break. If it looks cut, you need to look for a bur somewhere between the needle and the bobbin. If it looks like it was pulled apart, you may have the tension too tight for that thread/quilt/speed of your movement combination. Try loosening both tensions.
Bottom thread
Breakage
Bobbin thread breaking right at the tensioner of the bobbin case? This almost always is the result of too many stitches in one hole. It usually happens at pauses. Points, starts or stops in your quilting design. Too many stitches in one hole will wear through the thread quickly and snap it off right as the thread leaves the bobbin case. The cure is to work on your technique at these places in your design. Just move a little quicker here.
If the bottom thread breaks close to the bobbin case, the bobbin case tension could be too tight.
Always check to be sure the bobbin rotate clockwise in the bobbin case when you pull on the thread.
Check to see if you have a bobbin case backlash problem. To check this: set the bobbin and bobbin case flat on a table, bobbin facing down, lightly jerk on the thread while holding the bobbin case. If the thread wraps around itself it is backlashing. You can fix this problem by using a bobbin case with a backlash spring in it. The spring comes in regular for the (L) size and large for the (M).
Another way to fix this problem is to set a bobbin on a piece of paper and trace around it. Cut this out with a pair of scissors. When you are done this should look like a little doughnut. Now place this doughnut in your bobbin case before you install the bobbin. This will create some friction between the bobbin case and the bobbin reducing the chance of backlashing.
Something that is often overlooked is the way that the bobbin is wound. Always make sure that it is wound evenly and tightly. If it is too loose the thread will pull into itself and jam up. This will cause the thread to break. Check the thread in the bobbin by pressing on it with your fingernail. The thread should feel very firm, not spongy. Also remember to check the quality of thread that you are using.
Make sure that you keep the bobbin area clean. This will greatly reduce any problems that you have. A can of compressed air will help clear out any lint or debris from this area.
Setting the hook timing
Occasionally your machine may get knocked out of time. Usually this is caused by hitting a pin, binding a machine up in the batting, hitting a clamp, or even breaking a needle.
To set the timing first remove the bobbin and bobbin case. Remove the throat plate. Turn the thumb wheel clockwise so the needle bar is at its lowest position. By looking through the hook assembly you should now be able to see half of the eye of the needle. If you can’t you can adjust the needle by loosening the screw through the front handle and setting the needle at the proper position. Retighten the screw.
With the needle bar at its lowest position, notice the marks on the needle bar. Most machines will have five marks, some of the old machines will only have two marks. Determine which mark is lined up with the needle bar bushings then rotate the thumbwheel clockwise until the next mark lines up in its place. This should be about 3/32nds of an inch. This is the proper position of the timing hook.
Loosen the three big screws at the back of the hook assembly. Align the hook point to the back of the needle and slightly to the left side of the needle. Set the point of the hook so close to the needle that it looks like it is touching. Be careful that is not flexing the needle.
Tighten the three set screws and rotate the thumbwheel all the way around clockwise to make sure the needle doesn’t touch anything. If the needle hits or catches you will have to re-adjust it. If the needle clears then you can reassemble everything, thread the machine and sew.
Summary
Always remember that we want you to be successful. If you need help, Please call us.
| How to change the take up spring on the tension assembly.
-Loosen the set screw that is to the right of the tension assembly.
-Remove the assembly from the machine by rocking the assembly side to side and pulling at the same time.
-To remove the spring, loosen the slotted screw until you can pull the shaft out of the body of the tension assembly.
-Remove the tension spring and replace it with your new one. Make sure that the inside bend of the spring is placed in the slot in the shaft.
-Put the shaft and spring back into the rest of the assembly. Note that the thread loop fits into the slot of the asssembly body.
-You can adjust the tension of the spring by rotating the shaft. The factory setting is to rotate the the shaft so that the spring is just lightly touching the top of the slot in the assembly body.
-Tighten the slotted screw.
-Put the assembly back into the machine so that the spring is not rubbing against the machine body. About 1/8" to 1/16" away.
-With no thread in it, the spring should be at the 11 o'clock position.
-You may need to adjust your tension when finished.
| Setting Hook Timing
Warning: Always unplug everything before servicing your machine.
Put a new needle all the way into the needle bar, with the groove facing forward. Remove the bobbin case and bobbin from the hook. Remove the throat plate, and loosen the three big screws holding the hook to the hook shaft. Turn the hand wheel clockwise (from the needle end of the machine) until the needle is in its lowest position. Look through the hook at the eye of the needle. Half of the eye of the needle should be visible under the top of the hook. Adjust the needlebar height if it is more or less than half, by loosening the screw visible through the hole in the front of the machine head, moving the needle bar and re-tightening the screw. With the needle in its lowest position, notice the marks on the needle bar. Most Nolting machines will have 5 marks. Look at the position of the top mark and the bronze bushing above it. Rotate the hand wheel clockwise until the next mark is in the same position. Now the needle is in the proper position to set the hook timing.
Align the point of the hook with the back of the needle, and just slightly past center, of the needle, to your left. Move the hook toward you so that the hook point looks like it is touching the needle, but not flexing the needle. Tighten the three screws holding the hook to the shaft. Rotate the hand wheel all the way around, both clockwise and counter clockwise. Make sure that the needle is not touching the hook anytime during the rotation. If the needle touches or scrapes the hook, you will need to re-adjust. If the needle clears everything and the hook point is traveling very closely through the scarf of the needle, go back and really tighten the three screws holding the hook to the shaft. Re-assemble the rest, thread it and try it on a practice piece. It gets easier every time you do it.
| Knots showing when using contrasting colored thread
The bobbin and top thread should always be matched. Thread color should be selected to enhance the quilt top, not the backing. Because a handguided longarm machine sews in all directions, it is difficult to keep perfect thread tension. Matching thread ensures that unsightly “pokies” of contrasting bobbin and top threads will not show on your quilt.
|
|
|
|
|